
1
Open Export
Open the project’s menu and choose Export.
2
Choose the format and destination
Check the title, artist and genre. Choose an Export format and use Export Path → Change to select where to save it.
3
Create and check the archive
Choose Export, wait for completion and check the resulting file. Test the project on the destination computer before relying on it as your only copy.
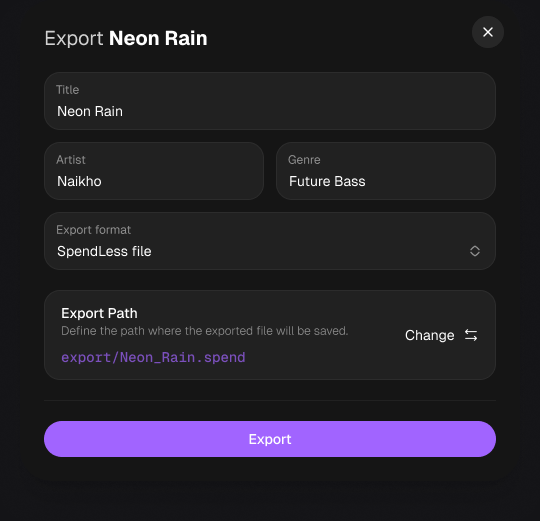
The project export dialog in the new design.
Before sharing
Make sure all samples play, the receiver has a compatible FL Studio version, and the required plugins and libraries are installed and licensed. Plugins themselves are not bundled. Only share samples and other files you have permission to redistribute. For a SpendLess archive, the other person can use Import and choose the .spend file. A ZIP import must contain an FLP.An exported project is not an MP3 or WAV. Render audio in FL Studio, then attach a preview if needed.